


What Is The Best Way To Photograph Handbags?
1. Cleaning
Myth: You should pay a service to clean your bags prior to selling.
Fact: You do not have to get a full-service cleaning on designer pieces you’re looking to sell. Unless you have a stain or mark that you cannot get out on your own, it won’t alter your price by enough to offset the cleaning costs. Instead, you can give it a gentle cleaning on your own prior to photographing. This will especially help if you have pets!
Based on the textile of your bags, use a microfiber cloth to gently wipe and remove dust, debris, or dirt off the outside of your item. Repeat the process on the inside of your bag and if it’s not a sensitive material, run a lint roller through the interior as well to get any last specks.
Now that your bag is refreshed, you’re almost ready to photograph! An underrated trick to assisting with photographing designer items? Stuffing them.
2. Stuffing
Myth: Laying your bag(s) flat on the ground is the ideal way to photograph.
Fact: It will be easiest to take photos of your bag(s) and to capture every detail if they are standing up, rather than lying down. However, with slouchier, less structured silhouettes this is less feasible. Enter: Stuffing.
From tissue paper, pillow inserts, socks, bubble wrap, packing paper, and more, use whatever is around your home to give your bag a little oomph in the structure department. More structured pieces like the Gucci Dionysus and Wallet on Chains might not need this so use it at your discretion.
For larger, slouchier styles like the Balenciaga City and Chloe Marcie bags, don’t feel you have to stuff until it stands. Use enough so that one can get a better sense of the shape and lean against a wall to hold it up better for photographing.
Now that your bags have a more visible shape, it’s time to photograph.
3. Equipment
Myth: You have to photograph your bag(s) with a professional camera.
Fact: With the incredible cameras in today’s average cell phone, gone are the days that you have to utilize a professional camera to properly capture your bag’s images. Your cell phone is a great asset for selling your pieces. The goal is to focus on keeping your image clear and your hand steady.
If you have a phone stand lying around your home, this is a wonderful opportunity to use it as it’ll make keeping your image in focus much easier. However, it’s far from a requirement. Simply double-check that when you zoom in, your photo is still in focus. With the equipment component ready to go, we’ll now examine how to best stage your items to photograph.
4. Lighting
Myth: Any lighting will work.
Fact: The goal of proper lighting is to most accurately portray the details of your bag(s) so we can provide the best potential quote upfront.
The most important factor for lighting is the brightness and surroundings. The brightness and way of light reflecting off of your surroundings can affect the way our experts are able to access and value your bag. Avoid harsher lighting that you could wash out the color or provide fewer details of the condition of your bag(s).
The most difficult aspect of photographing any bag is likely accurately photographing the serial number/date code. Use flash if necessary to best capture these details as they are essential to authenticating your bag(s).

5. Background
Myth: Only photograph on a pure white wall.
Fact: While a white background or wall certainly is ideal, almost any neutral, non-patterned backdrop will just as well. You can even create your own backdrop using items from around the house, such as bedsheets!
Take a test photo or two to see how the bag turns out against that background. If the color and condition come out clearly, you’re good to go and ready to fully photograph your pieces before moving on to the final step: uploading.
6. Uploading
Myth: Submitting photos will be a lengthy process.
Fact: You’re at the final step and almost ready to send off your offer! Uploading shouldn’t be a lengthy process and no need to edit or add a filter to your photos.
Filling out an offer form can be done via mobile or online. Airdrop or email your photos as an attachment if you'd prefer to upload from a computer or laptop. This ensures they are as high resolution as possible without compressing them to a lower resolution.
Double check that all photos are the right way up, rotate any that are upside down through your device, and from there you’re ready to submit and await to hear back from our team!
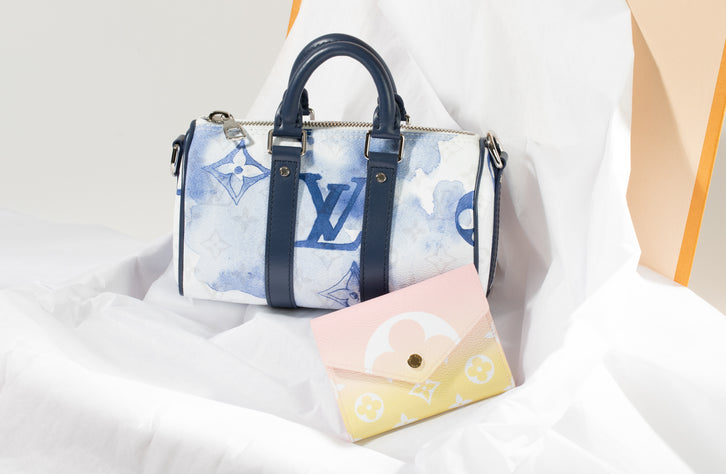
An Example Of Photographing Handbags

Why Photograph Your Bags?
While photographing may seem like a formality, it’s actually a very helpful and useful component to getting you the best prices as quickly as possible. Our experts examine your photos to ensure authenticity, condition, rarity, style, color, and more to ensure you’re getting the best possible price for your piece.
We hope these tips help in making the photographing process be quick and easy in getting cash for your designer bags. Gone through the steps and ready to submit? Click the button below to go straight to our offer form!